
Making natural dyes and using found botanicals for stencil patterns is nothing new. I have been wanting to experiment with both for ages now and this past week I finally made it happen with my photographer sidekick Kate. She’s a fellow craft addict and part of my unofficial coven.
Can I just say, we had so much fun. Between brewing up dyes and scavenging for interesting leaves, things got real witchy in my kitchen real fast. Add some red wine and Jen’s cackle to the mix and we were a scene straight out of Macbeth, that is if Macbeth were a comedy and the three witches were just middle-aged, semi-functioning alcoholics.

NATURAL DYES
First let’s discuss the dyes. Generally, you will want to prepare each of these by boiling the natural substances in about 4 cups of water, turning off the heat and then adding the eggs. The longer you leave the eggs, the darker the color. I found leaving them overnight made me happiest.
I’m going to start with the four that work the absolute best for this process.
Yellow onion skins
Yes, you heard me, onion skins. I found this one both surprising and awe inspiring. The piece of the onion we all discard can serve a beautiful purpose. Hit up your local grocery store and just dig down under the onion pile to find handfuls of amazing and wonderful loose onion skins. Shoppers will look at you like you’re crazy, but they don’t know the beauty you are about to create. Their loss! These create a beautiful, warm, sienna dye bath. Simply gorgeous and rich. I used about 2.5 cups of skins.
Red cabbage
We added baking soda to change the ph and this reaction is SUPER COOL! A couple of tablespoons of baking soda turned into a beautiful blue color. A couple more tablespoons turned it green. Science! So many beautiful colors from one red cabbage. Each of my dye baths included half a cabbage, cut into chunks.


Coffee
This one isn’t shocking right? Just think about what it does to teeth! Seriously though, instant coffee makes a perfect dye for eggs. It is an interesting cool brown and still quite different from the onion skins. I used 4 tablespoons.
Berries
I used a mix of blackberries, blueberries and raspberries. I’m pretty sure the blackberries are responsible for most of the color. These are interesting! This dye isn’t flat, it really picks up the texture of the berries and looks a little like the starry universe. I used a quart of each berry.
Turmeric and beets
I really wanted a yellow egg and read that turmeric could be used to make fabric dye. It didn’t cling to the eggs as well as I hoped. You definitely need to go way overboard on the amount of turmeric if you want something closer to a golden color. I used 3 tablespoons, but will probably use more next time. As for the beets, I thought this was a sure bet. Beets have made a permanent mark on multiple dish towels and cutting boards in my kitchen…why not eggs!? Again, it just didn’t cling to the egg shells as I hoped. It worked, and is actually really muted and pretty, but is not the deep red I expected. I used 5 medium beets cut into chunks.


BOTANICAL PATTERNS ON EGGS
Beauty can be found in some of the most unpredictable places. Here are some of the things we used:
- Arugula
- Rosemary
- Dill
- Dead, dried hydrangea petals hanging on from last summer
- Thistle
- Astrantia petals
- Boxwood
- Thyme
- Chickweed
- Rose petals (overlapped)
Once you’ve collected a variety of natural botanicals for your relief patterns, you just need the following:
- hard boiled eggs
- panty hose (I purchased knee highs)
- twist ties – thank you grocery store for these and the onion skins!
- a glass


INSTRUCTIONS:
- Pull the pantyhose all the way over the glass. Dampen your egg or botanical and press it against the egg where you want it. A little water helps it cling to the egg and stay in place.
- Gently place the egg in the pantyhose with your botanical side down and let it sink to the bottom of the glass. The pantyhose will curl up around your botanical to hold it in place. This is your chance to place another piece on the other side of your egg if the first one didn’t cover as much as you hoped.
- When you are ready, pull the pantyhose off of the cup and tighten it up around your egg as firmly as possible. Then twist the hose closed and put on the twist tie.
- For me, not everything stayed exactly where I wanted it. I found you can still move individual petals or sprigs around a bit from the outside of the pantyhose. They are ready to place in the dye baths!
- Bring your natural dye baths to a boil, turn off the heat and carefully drop in your eggs ensuring they are fully covered. For the darkest color, allow them to sit overnight. Paler colors will most likely be ready in a couple of hours.
- The next day, remove your eggs from the dye and place them on metal wire racks. You want to let them dry as much as possible before you unwrap and remove your botanicals. This will prevent the dye from running and will give you a more crisp line. Sitting them out in the sun for a few hours should work!
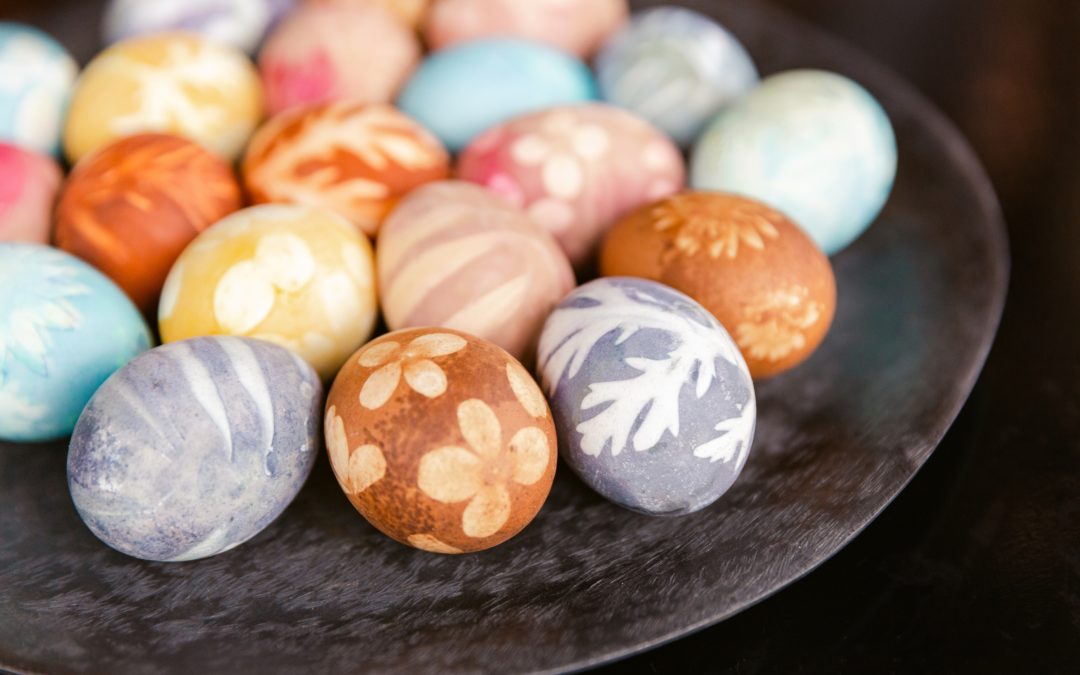
Unwrap and be marveled at the beauty of nature and your master crafting skills!
Cheers witches!
Liz
P.S. Don’t forget, if you are running out of time to plan that big Easter brunch you are hosting, we are here to help. Rent one of our gorgeous spring table scapes to get the perfect look without any effort or hire us to create something more personal.
Recent Comments