
NERD ALERT: I am so excited to talk about cyanotypes! This is such an easy and fun way to create art. As many of you know, I am also a professional photographer and have been for over 20 years. When I am talking to clients, I often remind them that photography is the art of capturing light. For two decades, my job has been to study light – its direction, strength, temperature and how to manipulate it. THAT is how you make a great photograph.
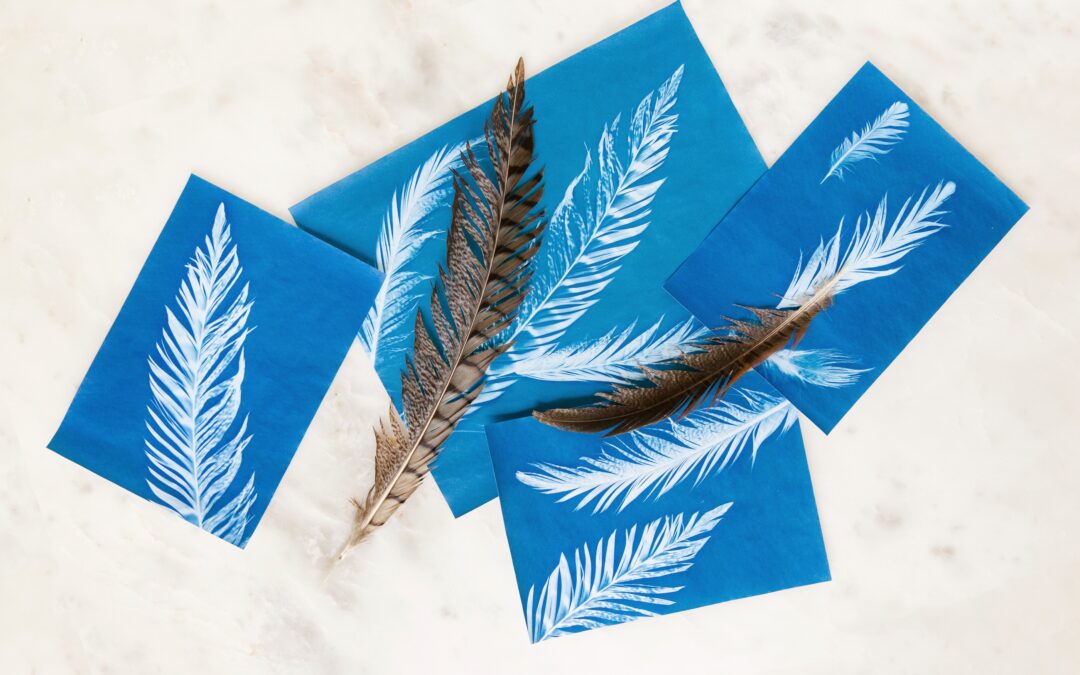
Cyanotypes are one of the earliest photographic processes. You are using light, in this case the sun, to make an artistic print. In a darkroom, we use a machine that emits light through a negative onto paper treated with silver emulsion. Then that paper goes into a chemical bath to develop and darkens where the light was showing through. With a cyanotype, our machine is the sun, and our negative is a creative mix of objects (which can be a photo negative as well!) Rather than silver, our printing paper is treated with iron emulsion and rather than a chemical bath, all we need is water.
This is so insanely simple. For about $25 you can create an entire afternoon of fun.


CYANOTYPE EMULSION OPTIONS
We recommend starting out with the simplest processes and continuing to learn and grow from there. For about $10, you can buy some pre-treated pieces of cyanotype paper. They are 100% ready to go! You can also buy pre-treated fabric, but it is more expensive. Better to work through trial and error using the affordable stuff! Once you get the hang of the basics, consider upgrading to paint on cyanotype solution. You can paint it on paper, fabrics such as t-shirts and bags or even untreated ceramic tile.


WHAT DO I NEED TO GET STARTED?
Cyanotype paper
A piece of glass
A piece of cardboard
Your collection of fun objects
A small tub of water


THE BEST WEATHER CONDITIONS
Honestly, you can do this any time of year as long as it’s not raining. Temperature doesn’t matter in the least. However, a sunny day with very little wind would be optimal. Sunny days will develop your prints much faster than cloudy ones, and windy days can make it tougher to keep your objects in place on the paper. But that is why you bought the glass!


THE PROCESS
Never have I ever had to type such a simple process. I’m not even sure this deserves its own section lol.
1. Make sure you have the supplies listed above ready to go. You will want your prep area to be either inside or in the shade. Not in direct sunlight.
2. Practice with your creative objects on your cardboard. Once you feel good about your design, pull a piece of cyanotype paper out of the envelope.
3. Now time is of the essence! You may not be in direct light, but you are still in some light, so the paper is now starting to be gently exposed. Quickly arrange your objects how you want them.
4. Once you are happy with your design, place the glass on top and press down to flatten your objects as much as possible.
5. Pick up your cardboard backer, using your hands to secure the glass, and walk your artwork out into direct sunlight.
6. Allow the sun to do its thing! You will notice the paper will change color and fade. Once it is nearly colorless or pale green, your print has been fully exposed. On a sunny day this could be as little as 1-2 minutes. Cloudy days may take quite a bit longer.
7. Once your print is exposed, carefully pick everything up and move it back out of the direct sunlight. Remove the glass and your objects and immediately place the paper in cold water. This will stop the printing process.
8. Allow to rinse for one minute or so and remove to dry.
9. Once dry, you may iron your art paper over a towel or place under a stack of heavy books to flatten.
10. Frame and enjoy for years to come!
We may have had way to much fun experimenting with all the different things you could use. So if you are looking for inspiration – KEEP SCROLLING! You may even spot ancient photos of little Liz and Jen.
xo-
Liz


Recent Comments